")
")
")
User Management
- 6.1 How to add a new user
- 6.2 How to edit a user
- 6.3 How to reset a user's password
- 6.4 How to delete a user
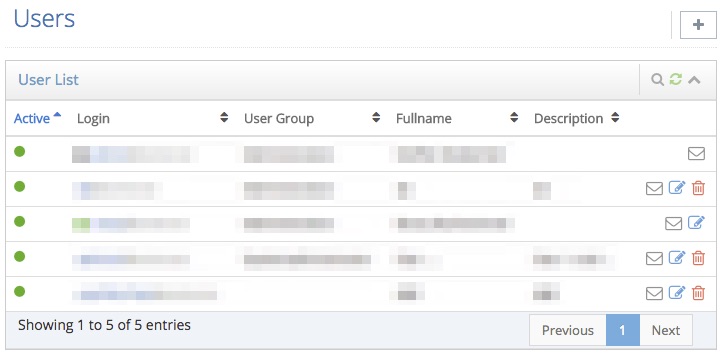
After you signed in successfully, an overview of all existing projects is displayed to you. To access the general administration of your account, click the orange welcome button in the upper right corner of your browser. A dropdown menu should appear. Click Administration to access the general administration of your account. In the left navigation of the administration, click Users. All existing users are displayed in a dynamic table that lets you search and sort your users. A user may access the administration of your multimomentanalysis. User groups help you regulate the access of every user to specific areas of the administration. Click the grey plus sign in the upper right corner of your browser to add a new user. With each user a blue pencil and a red trash can are provided for editing and deleting. If you need to reset a user's password and send the login credentials via e-mail, click the grey envelope next to the blue pencil. Please be aware that the users listed here only have access to the administration of your multimomentanalysis. They cannot sign in to the mobile or web application. Only participants may use these. Go to the administration of your project to manage your participants.
With each user the following settings are available:
Active: Select whether or not this user is active and may sign in to the administration.
Username: This user's username. Necessary for signing in to the administration.
Description: A short description of this user.
Fullname: The user's first and last name.
E-Mail: The user's e-mail address. Necessary for sending the login credentials via e-mail.
Mobile: The user's mobile phone number.
Phone: The user's phone number.
Description: Here you can add comments and notes about this user.
Language: The language used by the administration for this user.
Dateformat: The date format used by the administration for this user.
Timeformat: The time format used by the administration for this user.
User Group: Assign a user group to this user to regulate the access to specific areas of the administration.
Client: Assign one or more clients to this user. The user will only have access to projects belonging to these clients.
How to add a new user:
1. In the general administration go to Users.
2. Click the grey plus sign ![]() in the upper right corner of your browser.
in the upper right corner of your browser.
3. Fill out the form displayed in the dialog.
4. Click Save.
How to edit a user:
1. In the general administration go to Users.
2. Find the user you wish to modify and click the blue pencil ![]() in the user's row.
in the user's row.
3. Enter your changes in the dialog's form.
4. Click Save.
How to reset a user's password:
1. In the general administration go to Users.
2. Find the user who's password you need to reset and click the grey envelope ![]() in the user's row.
in the user's row.
3. Confirm your decision to reset this user's password by clicking OK. The new password will be sent to the user by e-mail.
How to delete a user:
1. In the general administration go to Users.
2. Find the user you wish to delete and click the red trash can ![]() in the user's row.
in the user's row.
3. Confirm your decision to delete this user by clicking OK.