")
")
")
User Groups
- 5.1 How to create a new user group
- 5.2 How to assign users to a user group
- 5.3 How to edit a user group
- 5.4 How to delete a user group
- 5.5 How to copy a user group
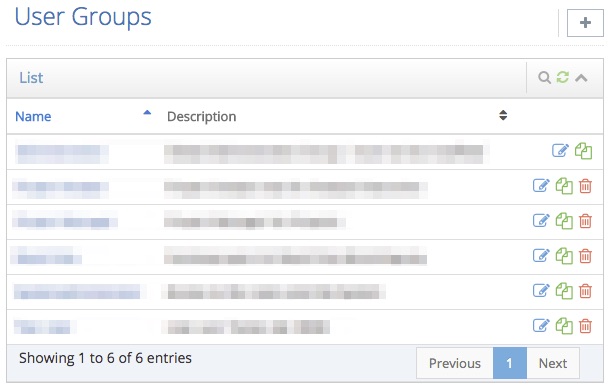
After you signed in successfully, an overview of all existing projects is displayed to you. To access the general administration of your account, click the orange welcome button in the upper right corner of your browser. A dropdown menu should appear. Click Administration to access the general administration of your account. In the left navigation of the administration, click User Groups. All existing user groups are displayed in a dynamic table that lets you search and sort your groups. User Groups are used to manage the rights of every individual user. Several users often share similar responsibilities and assignments for which they will require specific rights. Create a user group with exactly those rights for these users and assign every one of them to your new user group. Click the grey plus sign in the upper right corner of your browser to add a new user group. With each user group a blue pencil and a red trash can are provided for editing and deleting.
With each user group the following settings are available:
Name: The user group's name.
Description: A short description of the user group.
Rights: Read, write, create, delete and other rights for every area of the project administration. Enable the checkbox of a specific right to assign it to this user group.
How to create a new user group:
1. In the general administration go to User Groups.
2. Click the grey plus sign ![]() in the upper right corner of your browser.
in the upper right corner of your browser.
3. Fill out the dialog's form.
4. Click Save.
How to assign users to a user group:
1. In the general administration go to Users.
2. Find the user you wish to assign to your user group and click the blue pencil ![]() next to it.
next to it.
3. In the dialog, switch to the tab Access.
4. Select your user group.
5. Click Save.
How to edit a user group:
1. In the general administration go to User Groups.
2. Find the user group you wish to edit and click the blue pencil ![]() next to it.
next to it.
3. Enter your changes in the dialog's form.
4. Click Save.
How to delete a user group:
1. In the general administration go to User Groups.
2. Find the user group you wish to delete and click the red trash can ![]() next to it.
next to it.
3. Confirm your decision to delete this user group by clicking OK.
How to copy a user group:
1. In the general administration go to User Groups.
2. Find the user group you wish to delete and click the green copy symbol ![]() next to it.
next to it.
3. Enter your changes in the dialog's form.
4. Click Save.